- See more at: http://tutorialgeek.blogspot.com/2010/11/how-to-change-your-blogger-domain-url.html#sthash.sezFio1Q.dpuf

Wednesday, March 27, 2013

London Calling (and Paris!)

It’s official! My mom and I are headed to London and Paris in September! We’ve been planning (and saving) for this trip for a couple of years and now it’s actually happening!

I know some of you live/have lived/have visited London and/or Paris, so I’d love to hear your recommendations. Any must see/must do/must eat/must shop suggestions? Have you taken any tours that you really enjoyed (or didn’t enjoy)? Favorite spots/restaurants/shops? Places to stay away from? Let me know!

We are taking two weeks of vacation time from work, so we’ll probably spend four or five full days in each city. We are still in the early phase of planning our trip, so I’d love to hear your ideas!


Thursday, March 21, 2013

Office Mood Board

For the past couple of months I have been working solely on my kitchen…and I’m over it. I still have a few projects left on my list, but it’s time to move on*.  I’ll come back to the kitchen in a few months, but I’m ready to start working on the living room and the office.
*Note: I already bought a new kitchen faucet, so once that’s installed; I’m ready to move on.
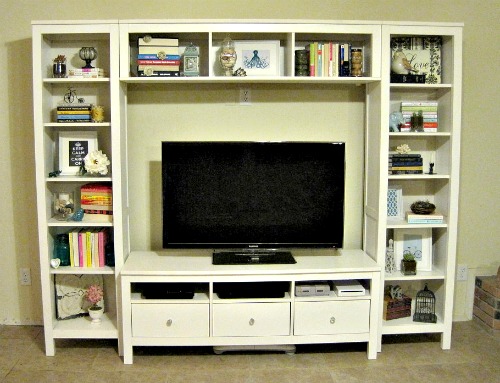
This is what our “office” currently looks like:


As of now, it’s not functional for two people and it’s not meeting our needs. Because there isn’t enough space to work in this room (my boyfriend’s legs don’t even fit comfortably under that desk), it’s become a junk room. And actually, that’s cleaner than it’s been in awhile. Thanks to our garage sale and a recent trip to Goodwill, you can actually see the floor and use the treadmill.
Anyway, I really want to create a space that has room for the both of us to work and can accommodate guests. So, here’s my plan to accomplish all of that: (source list at bottom of post)

I know I’ve been talking about painting stripes on the walls forever, but now I’m actually going to do it. I know it’s going to look amazing in there.
For the office part of the room I want to find a long (but not too wide) dining table. That would give each of us our own desk space and we wouldn’t have to stack our laptops anymore. We would still need some storage, so I love the idea of a file cabinet painted a fun color.  Above the desk I want to mount my small TV and create a gallery wall around it. One side of the gallery wall would be filled with things I love (above my side of the desk) and the other side would be filled with stuff my boyfriend likes (above his side of the desk).
As much as I’d like not to have the eyesore treadmill in there, I like being able to fit into my clothes, so it’s staying. I’m going to fill the large wall with a large DIY pallet art piece.
Also, I want to put a sleeper sofa in front of the window. I love the idea of being able to lounge and watch TV, but also have extra room for guests. I also want to replace the curtains and find/build an end table that can double as a nightstand. 
And finally, on the smaller wall (next to the closet) I want to add a dresser for storage. Hopefully we can use that to hide all of the junk this room accumulates. You can never have too much storage!
OK, so that’s the plan in a pretty picture. Here’s the to-do list:
Sell current desk on Craigslist
Clean out room
Paint stripes
Find table to use as desk
Buy 2 chairs
Buy pair of desk lamps
Buy and paint file cabinet
Mount TV on the wall
Create a gallery wall around the TV
Build pallet artwork
Sew curtains
Buy sleeper sofa
Buy/build end table
Buy dresser
Paint dresser
Sew pillows
Add accessories
  
Source List:

Tuesday, March 19, 2013

Two Year Anniversary

Two years ago today I moved into my house! I can’t believe it’s already been two years! To celebrate let’s look back on my second year of being a homeowner:
(You can see my year one recap here)

I painted two rooms, one linen cabinet, and my front door:


I painted a couple pieces of furniture for the entry/living room area:


I finally spent some of that money I’ve been saving up and splurged on:


I finished a few projects that have been on my to-do list for-ev-er:

I worked on a few small projects and did a little crafting:


And finally I started (and almost finished) my kitchen makeover:

Whew! That’s quite a list! Oh, and I can’t forget we took a trip to New Orleans in the spring and Disneyland in the fall!

But I still have to say, the best part has been sharing the house with my boyfriend and these 2:


I had a great second year as a homeowner and I can’t wait to see what I can accomplish over the next year. Here’s to another year full of more painting, more sewing, more projects, and more Ringo and Abby memories!

Monday, March 18, 2013

Christmas Break Project #2: Master Bathroom Baseboards

Can you believe it?! A project that’s not kitchen related! I actually have one more kitchen project to finish up and then I’ll probably be done with that room for awhile. I still have a few things left on my to-do list, but I’m ready to move on. I’ll finish up the kitchen eventually, but I’m ready to start working on the living room and the office (mood board coming soon).
Anyway, remember a few months ago I put together a list of projects I wanted to finish over Christmas Break? I told you all that I finished two of them, but I only ever blogged about moving the mirror…Well today I’m finally sharing the second project I finished over Christmas Break! If you are wondering what took me so long – I forgot! I got so used to seeing the baseboards every day I forgot about them until my parents visited a couple weekends ago. My dad hadn’t seen the baseboards yet and made a comment, which reminded me that I never shared this project.
As a reminder, here’s the master bathroom sans baseboards:

I’m pretty sure the previous owners removed the baseboards when they did the tile floor, but didn’t have a chance to replace them before the house went into foreclosure. That left me with a baseboard-less master bathroom for almost two years.
Well, the bathroom is no longer baseboard-less:

My boyfriend cut the baseboards to fit and then nailed them into place. I patched the nail holes and touched up the paint. I had painted the baseboards before they were installed, so they only need a quick touch up.
It’s not the most exciting update, but I’m so happy that I can finally cross that project off my list…now I just need to finish the living room baseboards!

Tuesday, March 12, 2013

Updated Menu Board

My menu board has been in need of an update even before the kitchen makeover began. When I first made it I just grabbed a couple random pieces of scrapbook paper, some sticker letters and threw it all together. It’s actually one of my favorite projects and I use it for meal planning every week, so it deserves to look its best.

I started the makeover by spray painting the frame white. I used some leftover Krylon Paint + Primer from my stash to give the frame a new look. I think I'm going to paint the picture stand white too, but I haven't done that yet.
Instead of making a new menu insert, I found this free menu printable from Smitten on Paper:

I love the design, but I did have to change the orientation (landscape instead of portrait) and crop it to fit my frame (8x10). I had it printed at Walgreens – actually I had to have it printed twice because the first time I sized the menu design too small (whoops!). Luckily they were having a 50%-off enlargements sale when I ordered both prints, so my mistake only cost me $2 instead of $4.   
Anyway, here’s my new menu board:

All of the white doesn't photograph nearly as good as it looks in person...Anyway, you might also notice that I bought matching oil and vinegar bottles. I think it looks better than the mismatched store bottles that were there before. I found them at Michael’s – they were $4.99/each, but were on sale for 40%-off, so I only paid $3/each.


That corner of the kitchen is now complete...and for only about $10!

To-Do List:
Add backsplash
Replace faucet
Update kitchen artwork
Update menu board
Create “Eat” sign
Create sign for above sink (to replace bon appétit sign)
Add accessories: potholders, towels, bamboo utensils/crock, oil/vinegar bottles

Thursday, March 7, 2013

Living Room Mood Board


With only a few projects left to do in the kitchen I’m ready to start planning my next room makeover – the living room! It’s the first room you see when you walk in the door, so I probably should have worked on this room a long time ago. Right now it’s just a mishmash of random furniture and it doesn’t give the best first impression.


But I have a plan – starting with a living room mood board!
Creating a mood board for my kitchen really helped me focus on what I needed to buy and what I needed to DIY to create a cohesive look. Instead of just buying random items that I liked, I focused on a consistent color palate. Plus it helped me realize how good my kitchen could actually look, which inspired me to stop procrastinating and start working. Seriously, that mood board was the best inspiration!  
Anyway, here’s the mood board I put together for my living room (source list at bottom of post):

The three main pieces for the room are the entertainment center, sectional, and rug. I think just having those three items would make a huge difference. Luckily I already have the IKEA entertainment center, so one of the most expensive pieces is already bought and paid for. Next is seating – I’m currently on the hunt for a reasonably priced gray sectional. We let the dogs on the couch, so I don’t want to buy a really nice one, but I also don’t want to waste my money on a piece of crap. I have a few options on my list (like this gray IKEA one), but I’m still undecided. After I decide on a sectional, it’s rug time! The dogs are fully housebroken, so I’m no longer worried about having a rug. I love that bold, blue one from Rugs USA.
Next to the entertainment center is the fireplace. For now I’m planning to add a large mirror above the mantle plus a boxwood wreath during spring/summer months (plus other decorations…obviously). Eventually I’d love to re-do the entire fireplace, but that’s going to be a bit of a battle (my boyfriend likes it as-is), so we’ll save that for another day.
I’d love to find a small card catalog for between the fireplace and window. I think it’s going to be hard to find the right size for a decent price, so this might be a DIY project. I love the one that Stacy built for her living room.
I’m also going to change up the curtains. I love the blue curtains, but I don’t love them with the rest of my plan, so they’ll move to one of the guest rooms. I’ve already bought five yards of that yellow ticking stripe fabric to sew new curtains for that window. Not pictured, but under consideration is an upholstered bench for in front of the window. I like the idea, but we’ll see once I get further into the makeover.
Behind the sectional is the big, plain wall where my painted console table lives. I love the color of the console, but that could change based on how the rest of the room turns out. I’m also planning to DIY a large abstract painting to hang above the table. Plus I want to add a large plant to cover more of the wall.
The rest is all accessories and pulling everything together. Now that I have a plan, I can’t wait to get shopping/DIY-ing!
To-do List:
Find sectional
Buy rug
Find coffee table
Buy garden stool
Style entertainment center shelves
DIY abstract art
Re-paint console table?
Buy large plant/pot
Decorate fireplace mantle
Sew curtains
DIY card catalog
Accessories


Source List:


Monday, March 4, 2013

Dash & Albert Rug + An Owl

Yep, another kitchen post…I swear I have other projects coming up, but I’m trying to stick with one room instead of my usual design A.D.D. Anyway, today I want to show you my new kitchen rug! It’s actually the only rug in the house and the first quality rug I’ve ever purchased.
The rug I originally had in my kitchen mood board was charcoal gray, but after some thought, I decided to find a rug with a pop of color instead. The curtains, countertops, and appliances are all gray-ish, so I thought a gray rug might be too much gray. Plus the room was due for some more color.  

After a lot of searching and price comparing, I ended up buying this Dash & Albert diamond print rug in canary. It’s an indoor/outdoor rug, so it can be cleaned with a hose. Ringo and Abby always hang out in the kitchen with me while I cook, so that was a big selling point. If you look close you can already see dirt marks.

I’ll be honest, I hated the color when I first saw it – I was hoping for mustard, but it was more marigold. My mom suggested that I use it anyway and give it a couple days before deciding to return it…especially since I’d have to pay return postage and a 25% restocking fee (I’d only end up getting about $20 back). As you can probably tell, the color grew on me and I’m happy with my rug purchase now. It makes the room look happier (and makes my feet feel happier).

Speaking of, I have another fun purchase to share today: my new utensil holder. I saw this owl at Michael’s and  thought it would make a fun utensil holder – better than a plain crock. It was 40%-off plus I had a coupon for an additional 20%-off, so I only paid a few dollars for it. The bamboo utensils are from Wal-Mart.

Here you can see my new rug and owl utensil holder (and sweet Abby). I still have a few projects left, but I love how it’s turning out. It’s definitely more “me” than any of the other rooms in the house.


To-Do List:

Add backsplash
Replace faucet
Update kitchen artwork
Update menu board
Create “Eat” sign
Re-pot plants
Create sign for above sink (to replace bon appétit sign)
Buy rug
Add accessories: potholders, towels, bamboo utensils/crock, oil/vinegar bottles

LinkWithin