- See more at: http://tutorialgeek.blogspot.com/2010/11/how-to-change-your-blogger-domain-url.html#sthash.sezFio1Q.dpuf

Friday, June 29, 2012

The Big 2-6!

Tomorrow is my 26th Birthday!

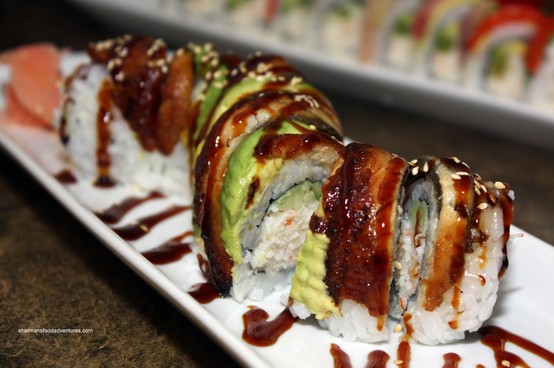
I’m planning to celebrate my big day with my boyfriend, friends, and a big plate of sushi!
Not that it’s all about presents, but I’m really curious to see what my boyfriend bought me. He didn’t ask for any suggestions and said he had a really good idea, so we’ll see. It better not be a fishing pole!
*Last year he bought me a bottle of my favorite perfume and a Victoria’s Secret gift card.

Wednesday, June 27, 2012

June After – FAIL

So, my bedroom still looks like this:

I completely dropped the ball on finishing the headboard project this month. Mostly because it took me half of the month just to decide what I was going to do. And then I spent the rest of the month being indecisive about the details.
So, I don’t have a finished headboard to show you this month, but I do have a plan…kinda.
I’ve definitely decided on an upholstered headboard. I like to read in bed, so that seems like the most logical/comfortable choice.
I’ve also decided on the shape…we’ll I’ve narrowed it down to 2 choices.
This:

Or the Belgrave shape:

I’ll probably decide once I have the fabric and I’m ready to cut out the shape. I already bought a jig saw in anticipation!

So, I was making good progress…and then I got caught up in the fabric decision…
First I was thinking vertical black and white stripes.

But with the black nightstands, white comforter, black and white curtains and black and white lamp shades the room was turning a little too black and white.
So, my next choice was Covington Windsor Citrus.

I want to keep the room light, bright, and airy, so I figured this could be a good choice. Plus it would bring in a little yellow to the room. Luckily, I decided to order a swatch before committing because the fabric didn’t look good in the bedroom.  
Now I’m waiting for a swatch of this fabric:

It’s an outdoor fabric, so I’m hoping it won’t be too stiff. And I’m hoping the details are white and not ivory.  I guess we’ll see!

So that’s where I’m at right now – crossing my fingers that I finally found the perfect fabric! I guess my June Project is now my July Project…

Monday, June 25, 2012

Concrete Patio

I finally have a backyard project to show y’all – 18 months in the making! 
When I bought my house I knew the backyard was going to need a lot of work. We loved the size, but it was pretty much dirt and weeds. This is what the backyard looked like during the inspection. And honestly, this is better than it really looked. The seller had hired someone to keep up the “landscaping”, but as soon as I signed that contract the upkeep stopped and the weeds took over within days.

This is a better representation of what the backyard really looked like when I moved in:

That’s just the side of the house, but you can kinda see the rest of the backyard in through the gate. Weeds galore!
Anyway, as soon as I moved in I knew that I wanted to extend the patio. That tiny slab of concrete was not nearly big enough for that size of a yard. Seriously, a quarter of an acre and I can’t fit more than a 2-person table and a BBQ on the patio? I don’t think so! I also wanted to add concrete along the side of the house to extend the driveway and make it easier to take out the trash (and no more weeds).
But that’s a big job (about 650 square feet) and big jobs are usually expensive. So, I saved up and then procrastinated calling for estimates. I seriously hate calling for estimates. And this time was no better. I called 7 different companies, none of them answered, and only 3 of them even called me back. To say I was getting annoyed with this project would be an understatement. Anyway, a few weeks later I got my estimates and picked a company.
We agreed to start the following week. He said it would take them about 3 days, so we sent Ringo to stay with my boyfriend’s parents for the week. Obviously he couldn’t stay outside while they were working and I didn’t want to leave him unattended in the house after the couch incident. But Abby stayed with us because she’s sweet and hasn’t destroyed any furniture (yet).
Anyway, onto the progress:
Day 1:
They finished all of the dirt work – grading and hauling away the excess dirt. They also were able to lay the forms for the concrete. Just seeing the shape of our future patio made me really happy!  


Day 2:
The first section of the concrete was poured. They completed the patio and the walkway in the first day.
Abby and her rawhide checking out the progress

No one should be as excited about concrete as I was that day. I went out 3 or 4 times just to stare at it.
Day 3:
The last section of concrete was poured. They completed the section along the side of the house and replaced part of the driveway in front of the house (a giant root pushed up part of the driveway, so they tore it out and replaced the concrete).  

All finished:
Ignore all of the junk on the patio – everything will be rearranged soon
I’m so excited to actually have some outdoor living space (although it’s too hot to be outside right now). Right now I’m on the hunt for a new patio set, but DAMN are they expensive! I’ll definitely be searching Craigslist for a set – I refuse to pay $800 for patio furniture.
We have still A LOT more work to do in the backyard, but at least now we have a little room to entertain (and less room for weeds to grow)!

Thursday, June 21, 2012

Pretty Pantry Labels

Can we all agree that no pantry makeover is complete without glass jars beautifully labeled? I’m sure we are all thinking of The House of Smiths beautiful pantry. *swoon*
Do you remember the glass jars I found at Goodwill? Are you sick of me starting every paragraph with a question? =)
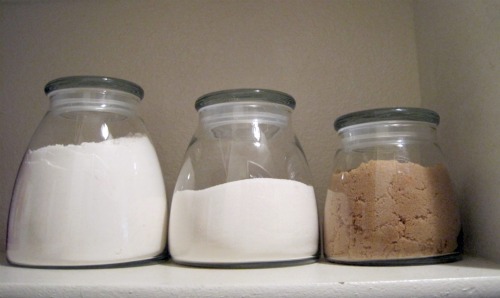
Anyway, the jars now hold my flour, sugar, and brown sugar.  

I actually found the exact same jars at Hobby Lobby one day. I was hoping for another large jar to store whole wheat flour, but they don’t have that size anymore. I was able to buy another small jar to hold oats though.
Then I found jars for my rice and pasta at IKEA. Yes, I have a lot of different kinds of pasta…and I don’t even really like pasta.  

Glass Jars: Check!
Now let’s talk labels and my first Silhouette project!
I wanted to label my baking supplies because from the top shelf it takes a second to see which jar is flour and which is sugar…and of course because it looks pretty. I also wanted to label the rice jars because I have white rice, jasmine rice, brown rice and brown jasmine rice. And those are pretty easy to get mixed up…and no one wants Spanish jasmine rice! I didn’t bother labeling the pasta jars because obviously I can tell shells from penne without a label.
I don’t have a tutorial for the labels because this was my first time using my Silhouette, so I’m probably not qualified to give anyone instructions on their machine. I wasted a lot of vinyl figuring out what I was doing and my cutting mat has “oa” permanently etched into it because I put the first piece of vinyl in the wrong corner. ..oops!
I used one of the borders that’s included with the program to make the labels. And I just used one of their stock fonts, but I think they turned out really nice.
My freshly labeled baking supplies (and new oats jar):

And the rice jars:

I’ll never mix up regular rice with jasmine rice again!

Another pantry project crossed off the ol’ list! I’m seriously so close to finishing up the pantry!

Complete
Paint walls
Paint shelves
Move ironing board to laundry room
Buy container for Ringo and Abby’s food
Trash expired food
Donate unused items
Recycle plastic bags
Rearrange items on shelves
Buy baskets and containers
Update light switch to white
Replace light fixture
Labels for glass jars


To-Do
System for storing plastic bags
Paint trim
Buy crate for cleaning supplies
Buy additional crate for rags
Find/paint one more bird hook
Touch up ceiling (around light fixture)

Wednesday, June 20, 2012

Summer Before – June Progress

As promised, today I’m sharing the first of 3 updates on my summer project. Last you saw, the craft room was a complete disaster area.


I haven’t started painting or working on any projects in here yet, but I have cleaned.


Look! I can actually use my sewing machine now!
I’m not completely finished clearing out the junk, but you wouldn’t believe the trash I pulled out of here (actually you might after seeing the before pictures). Trash went into the trash can and clutter went into boxes for the Goodwill.
I still have a lot of work left to do, but at least it’s not completely embarrassing anymore. Hopefully the walls and/or shelves will be painted by the next update…

Tuesday, June 19, 2012

Eiffel Tower Print

Have you noticed that my definition of soon ranges anywhere from a couple of days to like 10 months? I’ll use the pantry as an example. Do you remember when my dad replaced the light in the pantry and I said, “Oh man, I’m so close! Hopefully I can get those last few projects finished up, so we can have a final pantry reveal soon!” Yeah, that was April 9th – it’s now 2+ months later and nada.
So, if you saw this post on my facebook last week you probably figured soon actually meant 3 months from now.

Not this time! Soon actually meant soon!
Let’s jump back to my office makeover – when we last left off I still needed artwork.  I loved this print from Etsy, but I needed a portrait-oriented print and this one is landscape (and I’m too cheap to spend $30). It just so happens that one of my friends takes amazing photographs and loves to travel (Hi Scott!). So, I asked him if he had any pictures of the Eiffel Tower/Paris that I could print and hang. He sent me a folder of pictures and after some thought I picked an up close shot of the Eiffel Tower. I cropped the photo to fit an 8x10 frame and had it printed in black and white.

The frame is a Salvation Army find that I’ve been hoarding for this project for months. It used to be an ugly gold/brown color, so I spray painted it white. The mat was included, but with the white frame it’s really noticeable that it’s yellowed. I’ll probably need to replace that.
Anyway, here’s the first official piece of office artwork (not counting the chalkboard):

It’s nice to finally get something up on the walls, but I have a lot more to hang. I’m pushing for a Paris trip next year, so hopefully someday I’ll be able to replace this picture with one of my own. Until then, I’m glad I have friends that travel the world and own really nice cameras =)

Cost
Photograph –  $0 (Thanks Scott!)
Print – Walgreens $1.99 $0
Frame – Salvation Army $7.00 $4.90 (30% off sale)

Total $4.90


Thursday, June 14, 2012

Mason Jar Soap Dispenser

Sound the horns! I actually created something that I pinned!
Mason jar soap dispensers have been all over the blogosphere and Pinterest for awhile now. They are cheap and easy to make…and look a lot better than the plastic dispensers the soap comes in. I’ve wanted one for awhile, but I like foaming hand soap in the bathrooms…and I think the foaming pump would look goofy on a mason jar. So, I gave up on the idea until I realized I could make one for the dish soap in the kitchen!
I’m sure there are a lot of different tutorials out there, but I used the one from Christine at Park House Love.
This is her soap dispenser:
This is the soap dispenser I made using her tutorial:

The mason jar was a $1 thrift store find and the pump is from a bottle of Suave lotion. I liked that the gray pump kinda matches the zinc lid. I think the lotion was $2something at Wal-Mart. So now I have a pretty new soap dispenser for less than $4!
I already had the orange dish soap, but I think I’ll get a different color next time. Yes, I care about the color of my dish soap now. I’m weird…I know.

Anyone else create something they pinned lately?


LinkWithin