
Yesterday I showed you my updated gallery wall and the seashell shadow box that I made. Today I’m going to share how I turned a cheapo IKEA frame into a shadow box.

While I was updating my gallery wall I decided to add a sentimental piece. Last June my boyfriend and I went to California with his family for a cousin’s graduation. Of course we had to stop at the beach while we were there! My boyfriend spent part of the afternoon in the surf looking for seashells. He ended up with a nice collection, but they’ve been scattered on my nightstand since I unpacked our beach bag. I decided to frame them up and add them to the wall as a reminder of our first trip together.
I used a RIBBA frame from IKEA ($2.99). These work the best because they are nice and thick (and cheap).

Step 1: Remove the glass and innards. Paint the inside edge of the frame. I used Krylon Dual Paint + Primer Black in Satin. If you paint the inside anything other than black you’ll want to remove those black metal thingys too (I assume just pull out with pliers).

Step 2: Once the paint is dry, add a drop of hot glue to the inside corners of the frame. Place glass on top of hot glue. Be careful not to use too much glue – you don’t want it smushing out and showing through. I used hot glue, but you could also use gorilla glue or super glue.

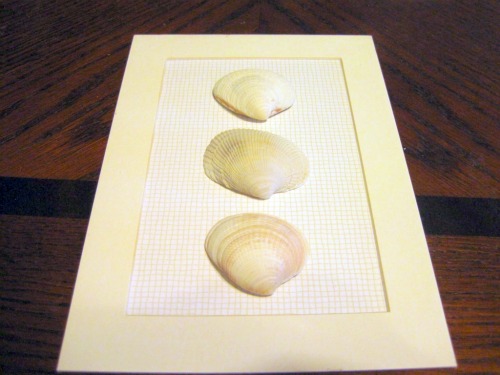
Step 3: Cut background piece (I used scrapbook paper). Glue the mat that came with the frame to the background paper. Layout your items and then glue them onto the background paper. I used hot glue to attach my seashells.
Step 4: Add your items and the cardboard backing. Secure the cardboard backing by hot gluing around the edges. It ain’t pretty, but who will be looking at the back of the frame? No one!

It’s not easy to get apart later, but it’s possible - trust me. An hour after I finished I dropped the whole thing and one of my shells fell off. I had to cut/peel the hot glue off to fix it. It wasn’t easy, but it wasn’t hard either.
Step 5: Hang and admire your handy work!

I’m sure there are other ways to do this, but this is what worked for me. Feel free to play around if you want yours to be less permanent. And if you don’t want to hassle at all, you can spend a little more money and buy a real shadow box. I would have bought the $9.99 option from IKEA if it had been the right size.

I really like the shells, very nice!!!
ReplyDeleteJodi
Oh it's so beachy! And I love it! I feel like I may be stealing this particular idea... muahahaha! Though the disadvantage is that I live 4 hours away from an IKEA. Dang... I love the gallery wall it's turning out great!!
ReplyDelete